How to Reset Honeywell Portable Air Conditioner: Step-by-Step Guide
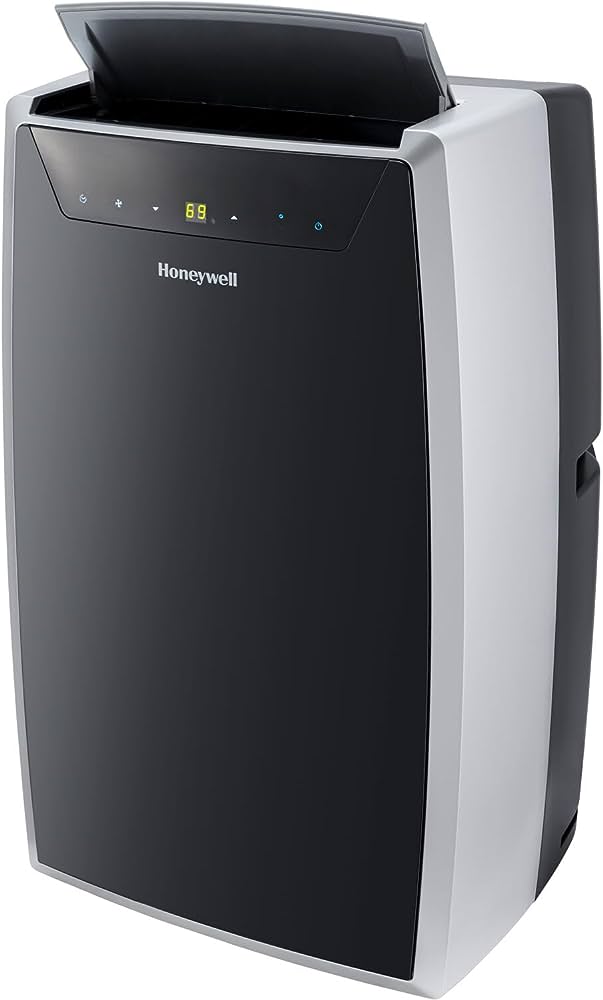
To reset a Honeywell Portable Air Conditioner, unplug the unit from the power outlet and locate the reset button on the front panel. Press and hold the reset button for three seconds.
If your portable air conditioner is not cooling properly or has stopped working, a reset may help resolve the issue.
Step 1: Unplug And Remove Front Panel
To reset your Honeywell portable air conditioner, start by unplugging it from the power outlet. Then, remove the front panel and find the reset button. Press and hold the reset button for three seconds to complete the reset process.
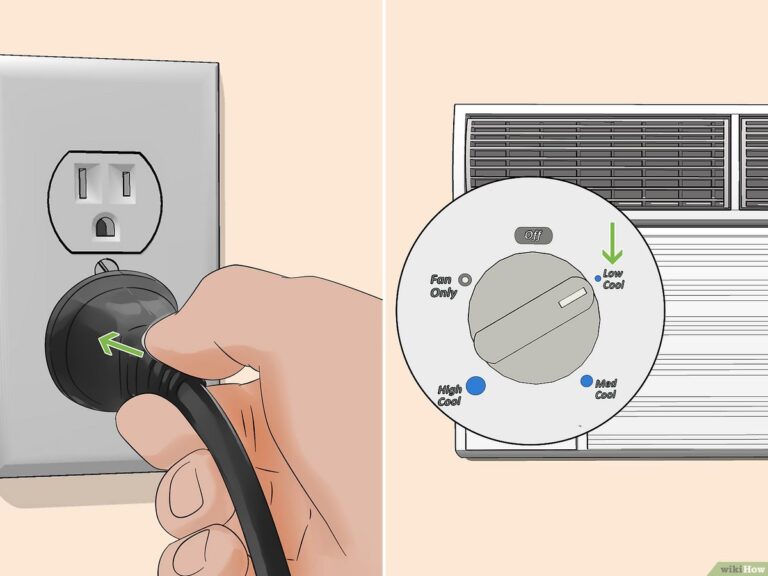
Unplug the unit from the power outlet:
- Ensure the portable air conditioner is turned off and disconnected from any power source.
- Locate the power cord and unplug it from the wall socket.
Remove the front panel of the portable air conditioner:
- Look for the front panel below the control panel.
- Gently pull the panel towards you to detach it from the unit.
- Set the front panel aside in a safe place.
Remember, always follow the manufacturer’s instructions provided in the user manual for your specific model of Honeywell portable air conditioner.
Step 2: Locate And Press The Reset Button
To reset your Honeywell Portable Air Conditioner, first unplug the unit from the power outlet. Remove the front panel and locate the reset button. Press and hold the button for three seconds to reset the unit. This will help in resolving any issues and restoring the AC to its original functioning.
Locate The Reset Button On The Unit:
- The reset button on the Honeywell portable air conditioner is typically located on the back or side of the unit.
- It may be labeled as “RESET” or indicated by a small hole with the word “RESET” next to it.
- Take a close look at the unit and locate the reset button before moving on to the next step.
Press And Hold The Reset Button For Three Seconds:
- Once you have located the reset button, use a small tool like a paperclip or a pen to press and hold the reset button.
- Hold the button down for approximately three seconds. You may need to use a bit of force to press the button.
- While holding the reset button, you may feel a slight click or see the unit’s display screen turn off and on.
- Release the reset button after three seconds, and the unit should be reset.
Remember, if your Honeywell portable air conditioner is still not functioning properly after resetting it, you may need to consult the user manual or contact Honeywell customer support for further assistance.
Step 3: Plug Back In And Test
To reset your Honeywell portable air conditioner, unplug the unit from the power outlet and remove the front panel to locate the reset button. Hold the button for three seconds before plugging back in and testing the unit. Ensure the power cord is not damaged and try plugging into a different outlet or changing the remote batteries if the AC is still not working.
Check the electrical plug for a built-in breaker and press the “test” button before resetting and attempting to turn on the AC again if it’s not blowing cold air.
Plug The Portable Air Conditioner Back Into The Power Outlet.
- Ensure that the air conditioner is securely plugged into a power outlet.
- Make sure that the power outlet is functioning properly by testing it with another electronic device.
- Double-check that the power cord is not damaged or frayed.
Test If The Reset Was Successful By Turning On The Unit And Checking If It Functions Properly.
- Press the power button on the portable air conditioner to turn it on.
- Set the desired temperature and fan speed using the control panel.
- Wait for a few minutes to see if the air conditioner starts cooling the room.
- Check if the air conditioner is blowing cold air and maintaining the set temperature.
- Listen for any unusual sounds or vibrations coming from the air conditioner.
- Observe if the air conditioner is able to cool the room effectively.
If the air conditioner fails to turn on or doesn’t function properly, you may need to repeat the reset process or consider seeking professional assistance.

Credit: smartacpoints.com
Troubleshooting Common Issues
If your Honeywell portable air conditioner is not working properly, you may need to reset it. To do this, unplug the unit, remove the front panel, and locate the reset button. Press and hold the button for three seconds to reset the air conditioner.
Air Doesn’T Feel Cold
Sometimes, your Honeywell portable air conditioner might not be blowing cold air as expected. Here are some troubleshooting tips to address this issue:
- Check if the air filter is clean and not clogged. A dirty filter can restrict airflow and reduce cooling efficiency. Clean or replace the filter if necessary.
- Ensure that all doors and windows in the room are properly closed. Leaks can let warm air in and hinder the cooling process.
- Verify that the temperature is set correctly. Make sure that the temperature setting is lower than the room temperature.
- Check if the exhaust hose is properly connected. Any leaks or disconnections can disrupt the cooling process. Secure the hose tightly to the unit and the window bracket.
- Consider lowering the humidity level. High humidity can make the room feel warmer. Turn on the dehumidification mode if your unit has this feature.
Ice Is Forming
When ice starts to form on your Honeywell portable air conditioner, it indicates an issue with the unit’s cooling system. Follow these troubleshooting steps to resolve the problem:
- Turn off the air conditioner and let it thaw. Allow the ice to melt completely before taking any further action.
- Verify that the air filter is clean and not obstructed. A dirty filter can restrict airflow and cause ice formation. Clean or replace the filter if needed.
- Check the temperature setting. If it is set too low, it can cause the cooling coils to freeze. Increase the temperature slightly and monitor the unit.
- Ensure that the exhaust hose is properly connected and not obstructed. Restricted airflow can lead to ice formation. Remove any kinks or bends in the hose.
- If the issue persists, contact Honeywell customer support for further assistance.
Room Seems Too Warm
If your room feels warmer than expected despite running your Honeywell portable air conditioner, try the following troubleshooting steps:
- Confirm that the air conditioner is properly sized for the room. If the unit is too small for the space, it may struggle to cool effectively. Consider upgrading to a higher capacity model if needed.
- Check if there are any sources of heat in the room, such as appliances or direct sunlight. Minimize heat sources or use curtains and blinds to block out sunlight.
- Verify that all doors and windows are closed tightly. Leaks can allow warm air to enter, making it difficult for the air conditioner to cool the space efficiently.
- Clean or replace the air filter if it is dirty. A clogged filter can impede airflow and hinder cooling performance.
- Make sure the air conditioner is not positioned too close to walls or furniture. Adequate airflow is vital for optimal cooling. Provide enough clearance around the unit for proper ventilation.
Common Sounds And What They Mean
Honeywell portable air conditioners may emit different sounds during operation. Understanding these sounds can help you identify any potential issues. Here are some common sounds and what they mean:
- Clicking or tapping sound: This is typically the sound of the compressor turning on and off, which is normal operation.
- Humming or buzzing sound: This is usually the sound of the fan or motor running, indicating normal operation.
- Gurgling or bubbling sound: This sound is often caused by refrigerant flowing through the cooling coils and is normal.
- Rattling or vibrating sound: Check if the unit is sitting on an unstable surface or if any objects are touching it. Secure the unit on a stable surface and remove any obstructions.
- Squealing or screeching sound: This may indicate a problem with the fan motor or belt. Contact Honeywell customer support for assistance.
Issues With Remote Control
If you’re experiencing issues with the remote control of your Honeywell portable air conditioner, try the following steps to troubleshoot:
- Ensure that the remote control has fresh batteries and that they are inserted correctly. Weak or incorrectly inserted batteries can prevent the remote from functioning.
- Verify that there are no obstructions between the remote control and the air conditioner. Remove any objects blocking the signal path.
- Make sure that the remote control is within the operating range of the air conditioner. Check the user manual for the recommended range.
- Reset the remote control and the air conditioner. Refer to the user manual for steps on how to reset both devices.
- If the issue persists, consider contacting Honeywell customer support for further assistance.
By following these troubleshooting tips, you can address common issues with your Honeywell portable air conditioner and ensure optimal performance and comfort throughout the hot summer days.
Honeywell Portable Air Conditioner Easy Installation
To reset your Honeywell Portable Air Conditioner, unplug the unit, remove the front panel, and locate the reset button. Press and hold the button for three seconds. Ensure the power cord is not damaged, try plugging it into a different outlet, and check the remote control batteries if the AC isn’t working.
Address common troubleshooting issues and check the electrical plug for a built-in breaker.
Easy Setup:
Setting up your Honeywell Portable Air Conditioner is a breeze. Follow these simple steps to get started:
- First, unpack your portable air conditioner and ensure that all parts are included.
- Locate a suitable location near a window for installation.
- Make sure there is enough space around the unit for proper ventilation.
- Plug in your portable air conditioner to a nearby electrical outlet.
Install The Exhaust Hose:
Proper installation of the exhaust hose is crucial for the optimal performance of your portable air conditioner. Follow these steps to install the exhaust hose:
- Locate the exhaust hose outlet on the back of the unit.
- Attach one end of the exhaust hose to the outlet securely.
- Extend the other end of the exhaust hose towards the window.
- Ensure that the hose is straight and free from any kinks or obstructions.
Assemble The Hose:
To assemble the hose of your Honeywell Portable Air Conditioner, follow these steps:
- Connect the exhaust hose to the window bracket using the provided connectors.
- Ensure a secure and tight connection between the hose and bracket.
- Adjust the length of the hose to fit your window size.
- Use the provided screws or adhesive tape to fix the window bracket in place.
Install Window Bracket:
Installing the window bracket properly is essential to create a seal and prevent hot air from entering your space. Here’s how to install the window bracket:
- Position the window bracket in the desired location on your window.
- Adjust the length to fit the width of your window.
- Secure the window bracket in place using screws or adhesive tape.
- Make sure the window is closed securely against the bracket to create a tight seal.
Operating Modes:
Your Honeywell Portable Air Conditioner offers different operating modes for customized cooling. Here are the available modes:
- Cool Mode: Cools the air in the room to your desired temperature.
- Fan Mode: Circulates air without cooling.
- Dehumidify Mode: Reduces humidity in the room.
- Sleep Mode: Adjusts the temperature and fan speed for optimal comfort during sleep.
Set Fan Speed:
You can easily adjust the fan speed of your Honeywell Portable Air Conditioner. Here’s how:
- Use the control panel or remote to access the fan speed settings.
- Choose from low, medium, or high fan speed to suit your preference.
- Higher fan speeds provide faster cooling, while lower speeds offer quieter operation.
Draining The Condensate Tank:
Over time, your portable air conditioner’s condensate tank may need to be drained. Follow these steps to drain the tank:
- Locate the condensate tank at the bottom of the unit.
- Place a container beneath the tank to collect the water.
- Remove the drain plug or access the drain hole.
- Allow the water to drain completely before replacing the plug.
Humidity Control Mode:
Your Honeywell Portable Air Conditioner features a humidity control mode to regulate the moisture levels in the room. Here’s how to activate this mode:
- Access the control panel or use the remote to navigate to the humidity control mode.
- Adjust the desired humidity level using the controls.
- The air conditioner will automatically adjust its settings to maintain the desired humidity level.
Fan Mode Operation:
In fan mode, your Honeywell Portable Air Conditioner operates without cooling. Here’s how to use the fan mode:
- Access the control panel or use the remote to select the fan mode.
- Choose your preferred fan speed from low, medium, or high.
- The unit will circulate air without cooling, providing a gentle breeze in the room.
With these easy installation steps and operating modes, your Honeywell Portable Air Conditioner will keep you cool and comfortable all summer long. Enjoy the convenience and efficiency of your portable cooling solution.
Honeywell Portable Air Conditioner Parts
If your Honeywell portable air conditioner is not working properly, you may need to reset it. To do this, unplug the unit and locate the reset button on the front panel. Press and hold the button for three seconds to reset the air conditioner.
Honeywell Replacement Exhaust Hose:
- The Honeywell Replacement Exhaust Hose is an essential part of your portable air conditioner that helps in the removal of hot air from the room.
- This replacement hose is designed to be easy to install and compatible with Honeywell portable air conditioners.
- It is made of high-quality materials that ensure durability and long-lasting performance.
- The exhaust hose is adjustable, allowing you to extend or shorten it to fit your specific needs.
- Replacing the exhaust hose is important if the original one gets damaged or starts leaking air, as it can affect the cooling efficiency of your portable air conditioner.
Honeywell Replacement Hose Connector:
- The Honeywell Replacement Hose Connector is another important part of your portable air conditioner that connects the exhaust hose to the unit.
- This connector ensures a secure and proper fit, preventing any air leaks.
- It is designed to be easy to install and compatible with Honeywell portable air conditioners.
- The replacement hose connector is made of high-quality materials that ensure durability and long-lasting performance.
- If you notice any air leaks or improper fitting of the exhaust hose, it is recommended to replace the hose connector to maintain the overall performance of your portable air conditioner.
Honeywell Mm-Mn Series Port:
- The Honeywell Mm-mn Series Port is a unique feature of Honeywell portable air conditioners that allows for easy and convenient connection of the exhaust hose.
- This port is designed to fit the specific size and shape of the exhaust hose, ensuring a secure and proper fit.
- The Mm-mn Series Port is made of durable materials that can withstand extreme temperatures.
- This feature makes it easy to install and remove the exhaust hose whenever needed.
- If you have a Honeywell portable air conditioner with the Mm-mn Series Port, you can enjoy quick and hassle-free setup of your unit.
Honeywell Hose Connector:
- The Honeywell Hose Connector is an essential accessory for your portable air conditioner that helps in connecting the exhaust hose to the window bracket or sliding glass door kit.
- This connector ensures a secure and proper fit, preventing any air leaks.
- It is designed to be easy to install and compatible with Honeywell window bracket and sliding glass door kit.
- The hose connector is made of high-quality materials that ensure durability and long-lasting performance.
- If you need to connect your exhaust hose to a window or sliding glass door, the Honeywell Hose Connector is a necessary accessory.
Honeywell Window Bracket Hol:
- The Honeywell Window Bracket Hol is a crucial component of your portable air conditioner that helps in securing the window bracket to the window.
- This bracket hol ensures stability and prevents any movement or displacement of the window bracket.
- It is designed to be easy to install and compatible with Honeywell portable air conditioners.
- The bracket hol is made of durable materials that can withstand the weight and pressure of the window bracket.
- Proper installation of the window bracket hol is essential to prevent any accidents or damage caused by a loose or unstable window bracket.
Honeywell Replacement Exhaust Ho:
- The Honeywell Replacement Exhaust Ho is a necessary component of your portable air conditioner that helps in removing hot air from the room.
- This replacement exhaust ho is designed to be compatible with Honeywell portable air conditioners and ensures efficient cooling.
- It is made of high-quality materials that ensure durability and long-lasting performance.
- The exhaust ho is adjustable, allowing you to extend or shorten it to fit your specific needs.
- Replacing the exhaust ho is important if the original one gets damaged or starts leaking air, as it can affect the cooling efficiency of your portable air conditioner.
By following these instructions, you can easily maintain and replace the necessary parts of your Honeywell portable air conditioner, ensuring its optimal performance and cooling efficiency.
Frequently Asked Questions On How To Reset Honeywell Portable Air Conditioner
How Do I Reset My Honeywell Portable Air Conditioner?
To reset your Honeywell portable air conditioner, follow these steps: 1. Unplug the unit from the power outlet. 2. Remove the front panel and locate the reset button. 3. Press and hold the reset button for three seconds. 4. Plug the unit back in and power it on.
How Do I Reset My Portable Air Conditioner?
To reset your portable air conditioner, follow these steps: 1. Unplug the unit from the power outlet. 2. Remove the front panel and locate the reset button. 3. Press and hold the reset button for three seconds. 4. Plug the unit back in and turn it on.
If your Honeywell portable air conditioner is not working properly, resetting it may help resolve the issue.
Why Is My Honeywell Portable Ac Not Working?
If your Honeywell portable AC is not working, check the power cord for damage and proper connection. If the cord is fine, try plugging into a different outlet or resetting the circuit breaker. Also, check the remote control batteries if you are using one.
Why Is My Honeywell Portable Air Conditioner Not Blowing Cold?
To reset your Honeywell portable air conditioner, unplug it from the power outlet. Remove the front panel and find the reset button. Hold the button for three seconds. Check the power cord for any damage or loose connection. Try plugging it into a different outlet or resetting the circuit breaker.
Ensure that the remote batteries are working. Press the “test” button on the breaker, then press the reset button and try turning on the air conditioner again.
Conclusion
To reset your Honeywell portable air conditioner, follow these simple steps. First, unplug the unit from the power outlet. Then, locate the reset button, which can usually be found behind the front panel of the unit. Press and hold the reset button for three seconds.
This will reset the air conditioner and restore it to its original settings. If your portable air conditioner is not cooling properly or has stopped working altogether, resetting it may solve the issue. Additionally, make sure to check the power cord for any damage and confirm that it is plugged in correctly.
If necessary, try plugging the unit into a different outlet or resetting the circuit breaker. Troubleshooting common problems, such as a remote control with low batteries, can also help resolve any issues. By following these steps and performing routine maintenance, you can ensure that your Honeywell portable air conditioner continues to provide efficient cooling in your space.

