Carrier Outdoor Unit Communication Fault: Troubleshooting Tips and Solutions
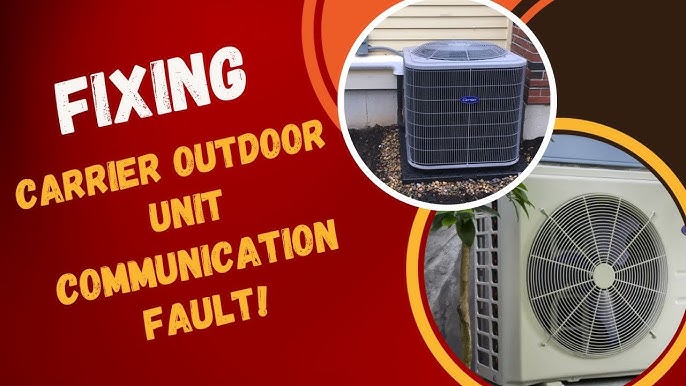
Carrier Outdoor Unit Communication Fault typically occurs when there is a communication problem between the outdoor unit and the other components of the HVAC system. This can cause issues with the unit’s operation and efficiency.
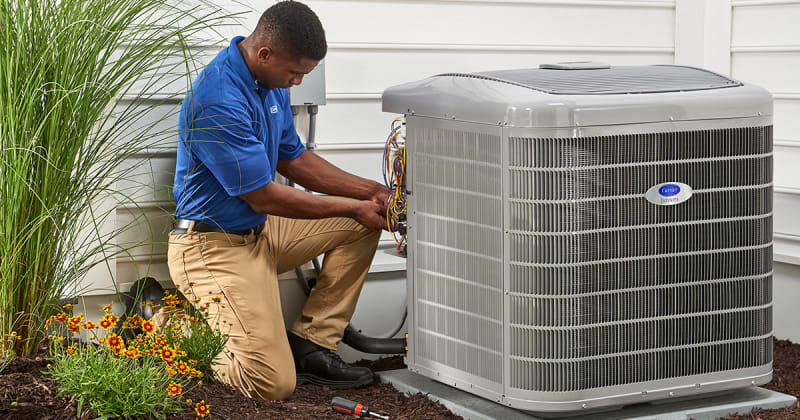
To troubleshoot this problem, it is important to check the wiring connections, control boards, and communication protocols to ensure they are functioning correctly. Additionally, inspecting the outdoor unit for any physical damage or obstruction can also help identify the cause of the communication fault.
Regular maintenance and timely repairs can prevent this issue and ensure optimal performance of the outdoor unit.
Credit: www.carrier.com
Common Causes Of Communication Faults
Communication faults in Carrier outdoor units can occur due to various reasons including wiring issues, faulty components, or incompatible settings. These faults can disrupt the unit’s ability to communicate with the central system, leading to inefficient performance and potential system breakdowns.
When it comes to Carrier outdoor unit communication faults, several factors can cause these issues to arise. Understanding the common causes behind communication faults can help you diagnose and address the problem effectively. In this section, we will explore the main culprits responsible for communication faults in Carrier outdoor units.
Power Supply Issues:
- Insufficient power supply: This occurs when the outdoor unit does not receive an adequate amount of electricity to function properly.
- Voltage fluctuations: Fluctuations in voltage can disrupt the communication between the outdoor and indoor units, leading to a communication fault.
- Electrical surges: Power surges can damage the communication connection between the units, resulting in communication faults.
- Inadequate grounding: Improper grounding can cause issues with the power supply, which may lead to communication faults.
Faulty Wiring Connections:
- Loose connections: Loose or improperly connected wires can disrupt the communication flow between the outdoor and indoor units.
- Damaged cables: Physical damage to the communication cables can interrupt the communication between the units.
- Crossed wiring: Incorrectly connected or crossed wires can cause confusion in the communication signals, resulting in communication faults.
Incompatibility Between Indoor And Outdoor Units:
- Mismatched models: Using indoor and outdoor units from different Carrier models can lead to compatibility issues, resulting in communication faults.
- Incompatible communication protocols: If the communication protocols of the indoor and outdoor units are not compatible, it can hinder the effective transfer of information between the two units.
- Firmware mismatch: If the firmware versions of the indoor and outdoor units do not match, it can cause conflicts in the communication and lead to faults.
Addressing these common causes of communication faults can help prevent disruptions and ensure the smooth functioning of your Carrier outdoor unit. By identifying the specific issue causing the fault, you can take the appropriate steps to resolve it and restore the communication between your outdoor and indoor units.
Testing And Diagnosing Communication Faults
Identifying and resolving communication faults in Carrier outdoor units is crucial for efficient operation. Our testing and diagnostic techniques ensure accurate detection and prompt resolution of any issues, optimizing communication performance.
Carrier Outdoor Unit Communication Fault:
Is your Carrier outdoor unit experiencing communication faults? Don’t worry, we’ve got you covered. In this section, we will discuss the essential steps you can take to test and diagnose these communication faults. By following these troubleshooting methods, you can identify the issue and potentially resolve it yourself.
Let’s dive in!
Checking Power Supply To The Outdoor Unit:
To ensure that the power supply is intact, follow these steps:
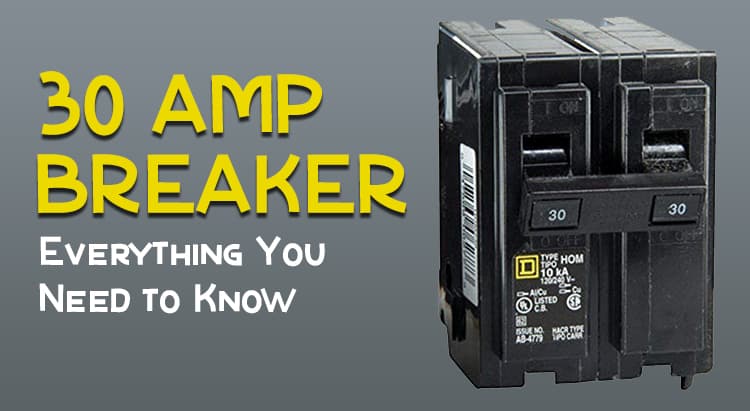
- Check the circuit breaker: Ensure that the breaker supplying power to the outdoor unit is not tripped. If it is, reset it and observe if the communication fault is resolved.
- Inspect power connections: Confirm that all electrical connections related to the outdoor unit are tightly secured. Loose connections can cause communication issues.
- Test power output: Using a multi-meter, measure the voltage at the outdoor unit’s power terminals. Make sure it matches the specified voltage in the user manual.
Verifying Wiring Connections:
Proper wiring connections are crucial for communication between components. Here’s how to verify them:
- Inspect wiring harness: Visually examine the wiring harness for any signs of damage or wear. Replace if necessary.
- Check terminal connections: Ensure that the wiring connections at the terminals are tight. Loose or corroded connections can hinder communication.
- Verify wiring sequence: Cross-reference the wiring diagram in the user manual and compare it with the actual wiring. Any discrepancies should be corrected following the manual’s instructions.
Using A Multi-Meter To Test Voltage And Continuity:
A multi-meter can be a handy tool to detect voltage and continuity issues in the outdoor unit’s communication system. Here’s how you can use it:
- Test voltage: Measure the voltage across relevant terminals, such as communication ports or data wires. Compare the readings with the specifications outlined in the user manual. Deviations may indicate a fault.
- Check continuity: Use the multi-meter’s continuity feature to verify if there is an uninterrupted flow of electrical signals through the communication wires. Any breaks or interruptions may signify a communication fault.
By adhering to these testing and diagnosing methods, you can effectively troubleshoot communication faults in your Carrier outdoor unit. Remember to consult the user manual for specific instructions and contact a professional technician if you need further assistance. Happy troubleshooting!
Fixing Communication Faults
The Carrier outdoor unit may experience communication faults, causing disruptions in your system’s operation. Fixing these faults is crucial to ensure efficient and reliable communication between components.
:
When your carrier outdoor unit experiences communication faults, it’s crucial to address the issue promptly to restore proper functionality. Here are some effective solutions to fix communication faults:
Replacing Damaged Wiring:
- Inspect the wiring connections: Carefully examine all the wiring connections in the outdoor unit. Look for signs of wear and tear, loose connections, or any visible damage.
- Identify damaged wires: If you spot any damaged or frayed wires, it’s essential to replace them immediately. Damaged wiring can interfere with efficient communication between components.
- Replace with compatible wires: Ensure that the replacement wires are compatible with the specific carrier outdoor unit model. Using mismatched or low-quality wires may lead to further communication problems.
Resetting The Communication Module:
- Locate the communication module: Find the communication module in your carrier outdoor unit. It is typically situated near the control board or in a designated compartment.
- Power off the unit: Before proceeding with the reset, turn off the power supply to the carrier outdoor unit to avoid any electrical mishaps.
- Reset the module: Use the manufacturer’s instructions to reset the communication module. This might involve pressing a specific button or holding it for a certain period.
- Power on the unit: Once the reset is complete, restore the power supply to the carrier outdoor unit and observe if the communication fault has been resolved.
Updating Firmware To Resolve Compatibility Issues:
- Identify compatibility concerns: In certain cases, carrier outdoor unit communication faults can arise due to compatibility issues between different system components.
- Check for firmware updates: Visit the manufacturer’s website or contact their customer support to determine if there are any firmware updates available for your specific model.
- Download and install updates: If updates are available, follow the instructions provided by the manufacturer to download and install the latest firmware for your carrier outdoor unit.
- Test system communication: After updating the firmware, observe whether the communication fault has been resolved. If not, consider seeking further assistance from a professional technician.
Remember, addressing communication faults promptly will help ensure the optimal performance and efficiency of your carrier outdoor unit. By following these simple steps, you can quickly resolve communication issues and restore the seamless operation of your system.
Fixing communication faults in your carrier outdoor unit involves replacing damaged wiring, resetting the communication module, and updating firmware to resolve compatibility issues. Taking these steps will aid in restoring effective communication within your system, allowing it to function seamlessly.
Preventive Maintenance For Carrier Outdoor Units
Ensure smooth communication with Carrier outdoor units by implementing preventive maintenance practices. Avoid common issues like communication faults to maintain optimal performance.
Regular cleaning and inspection:
- Start by cleaning the outdoor unit regularly to ensure optimal performance.
- Remove any debris or dirt that may have accumulated on the unit’s surface.
- Inspect and clean the condenser coils to prevent dust buildup, which can hinder heat transfer.
- Check for any signs of corrosion or damage on the unit’s exterior.
- Lubricate the motor’s moving parts to reduce friction and extend its lifespan.
Checking for loose connections:
- Regularly inspect the electrical connections on the outdoor unit.
- Look for any signs of loose or worn-out wires.
- Tighten any loose connections to prevent electrical faults.
- Make sure all wires are properly insulated to avoid electrical hazards.
Monitoring for unusual heating patterns:
- Observe the unit’s heating patterns regularly.
- Check the temperature of the unit during its operation.
- Pay attention to any sudden or drastic changes in heating patterns.
- If you notice any unusual heating patterns, it may indicate an issue that requires attention.
By following these preventive maintenance steps, you can ensure the optimal performance and longevity of your Carrier outdoor unit. Regular cleaning, checking for loose connections, and monitoring heating patterns are essential to prevent communication faults and other potential issues.
Troubleshooting Tips For Specific Error Codes
Carrier outdoor unit communication fault? Troubleshooting tips for this error code are essential to resolve the issue effectively. These tips help identify and fix the root cause, ensuring smooth communication between the outdoor unit and the system.
Error Code 14: Loss Of Communication With The Indoor Unit
At times, you may encounter error code 14 on your Carrier outdoor unit, indicating a loss of communication with the indoor unit. This disruption in communication can lead to improper cooling or heating in your home. Don’t fret, though! Below are troubleshooting tips to help you identify and resolve this issue:
- Check the wiring connections between the outdoor and indoor units. Ensure that they are securely fastened and undamaged.
- Examine the control boards in both units for any loose or damaged wires. If any issues are found, consult a professional technician to repair or replace the affected parts.
- Restart the outdoor unit by turning off the power supply for a few minutes and then turning it back on. This simple reboot may restore communication between the units.
- If the problem persists, it is best to contact a trained HVAC technician who can diagnose and repair the issue.
Error Code 24: Communication Interference
Error code 24 appears when external interference disrupts the communication between the outdoor and indoor units. This interference can be caused by various external factors. The following troubleshooting steps will aid in identifying and addressing the interference:
- Wi-Fi routers, cordless phones, and other electronic devices can emit signals that interfere with the communication between the units. Ensure that these devices are placed away from the HVAC system.
- Metal objects near the outdoor unit can impact the communication signal. Remove any metal obstructions situated close to the unit, such as fences or gardening tools.
- Proper installation techniques can minimize interference. Ensure the outdoor unit is installed away from potential sources of interference, such as power lines or other electrical equipment.
- In some cases, installing additional shielding or barriers, like insulating foam, may help in reducing interference caused by nearby electrical sources.
Error Code 34: Incompatible Air Handler
If you encounter error code 34, it means that the air handler installed indoors is not compatible with the outdoor unit. To resolve this issue, consider the following troubleshooting steps:
- Verify the compatibility of the outdoor and indoor units by checking the manufacturer’s specifications and guidelines. Ensure that both units are from the same series and that they are designed to work together.
- If the units are not compatible, you may need to upgrade the air handler to a compatible model. Consult with an HVAC professional to determine the best course of action.
- In some cases, replacing the air handler with a compatible one may be necessary. This will ensure that the communication between the outdoor and indoor units functions smoothly.
Remember, when dealing with error codes on your Carrier outdoor unit, it is always advisable to consult with a qualified HVAC technician who can accurately diagnose and resolve any issues you may encounter.
Frequently Asked Questions Of Carrier Outdoor Unit Communication Fault
What Does It Mean When A Carrier Outdoor Unit Has A Communication Fault?
The communication fault in a Carrier outdoor unit indicates a problem with the communication between components. It can be caused by faulty wiring, damaged cables, or a malfunctioning control board. This fault can affect the performance and efficiency of the unit.
How Can I Troubleshoot A Communication Fault In My Carrier Outdoor Unit?
To troubleshoot a communication fault in your Carrier outdoor unit, first check the wiring and cables for any visible damage or loose connections. If everything looks fine, try resetting the unit by turning off the power for a few minutes and then turning it back on.
If the fault persists, it’s best to contact a professional technician for further diagnosis and repair.
Can A Communication Fault In A Carrier Outdoor Unit Be Fixed?
Yes, a communication fault in a Carrier outdoor unit can be fixed. However, it requires identifying and resolving the underlying issue causing the fault. In some cases, it may involve repairing or replacing damaged wiring or components. It’s important to seek help from a qualified HVAC technician to properly diagnose and fix the problem.
Conclusion
Resolving a communication fault in your Carrier outdoor unit is crucial for maintaining optimal performance and energy efficiency. By understanding the common causes and troubleshooting steps, such as checking wiring connections, resetting the unit, and contacting a professional technician when necessary, you can ensure the fault is identified and rectified promptly.
Regular maintenance and scheduled inspections will also contribute to preventing such communication faults in the first place. Ignoring communication faults can lead to reduced system performance, increased energy consumption, and potential damage to the unit. By promptly addressing communication faults and being proactive in maintaining your outdoor unit, you can enjoy a comfortable and energy-efficient indoor climate throughout the year.
Don’t hesitate to seek professional assistance to ensure proper functioning and longevity of your Carrier outdoor unit.

